The main portion of the Offshore footer is a widgetized section that can display widgets in 1-6 (except 5) columns. Widgets add various content or features to your site. They can be added, removed, and rearranged in the Appearance > Widgets tab on your WordPress admin panel.
How To Add Widgets To The Footer
- Step 1 – First, make sure that you’ve enabled pre-footer widgets area on your site. To do this, navigate to the Appearance > Customize > Offshore Options > Global Footer Options panel and turn OFF the ‘Hide Pre Footer Widgets’ and ‘Hide Footer’.
- Step 2 – Once you’ve enabled footer widgets, navigate to Appearance > Customize > Widgets OR Appearance > Widgets to access the widgets and pre-footer widgets area.
- Step 3 – You will now see Pre Footer Widgets area. Click on the ‘Pre Footer Widgets’ text to expand the area if not already expanded.
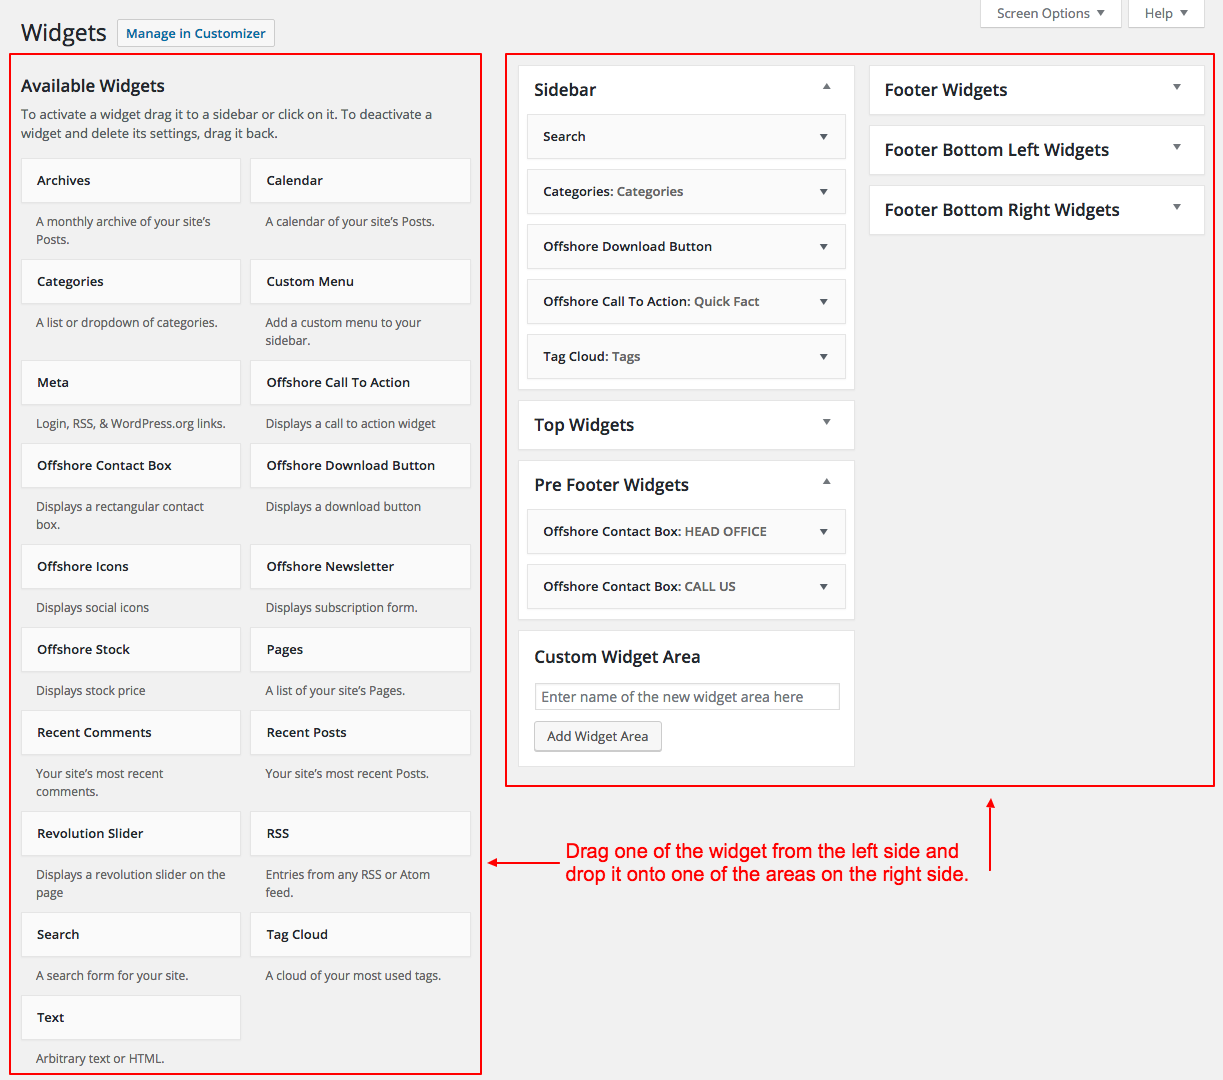
- Step 4 – Simply drag and drop the widgets you want from the left side into the ‘Pre Footer Widget’ area on the right side. If using customizer then click Add a Widget button and click on a widget to add it to the ‘Pre Footer Widget’ area. See the screenshots below.
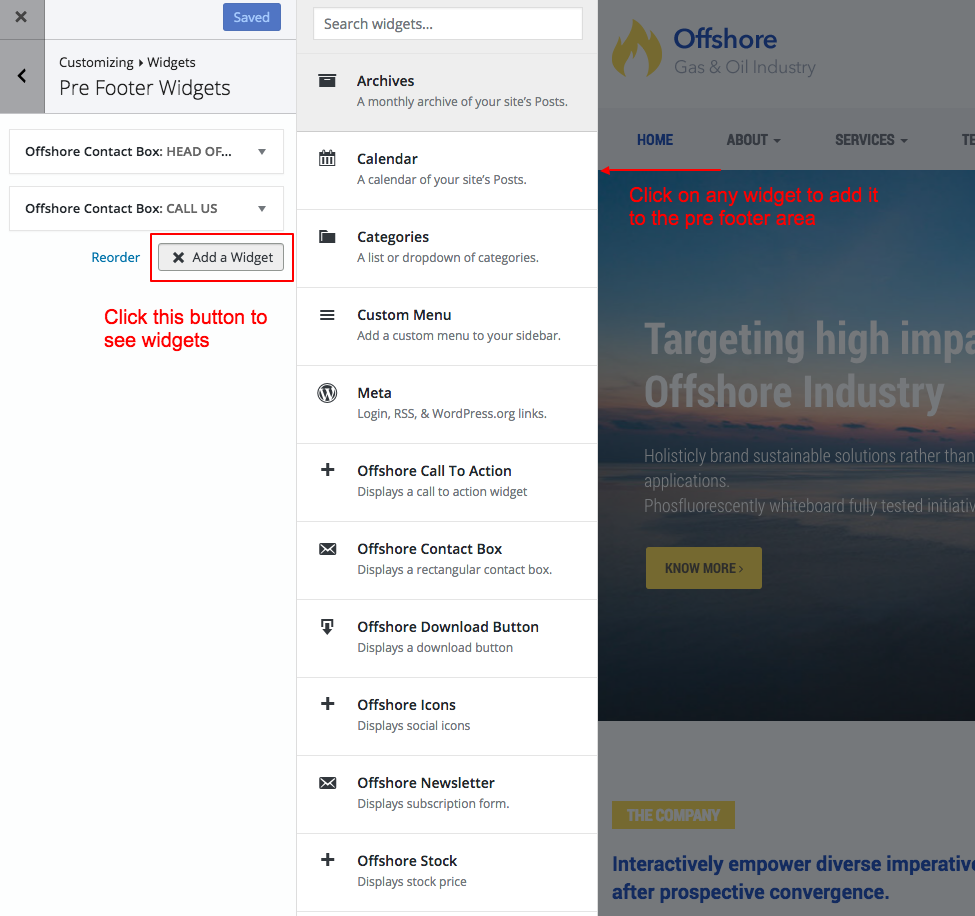
Pre Footer Widget Area Using Customizer